|
|
||
|---|---|---|
| .. | ||
| assets | ||
| bot | ||
| webpart | ||
| README.md | ||
README.md
Basic Site Provisioning using SharePoint Framework client-side web part and Microsoft Bot Framework
Summary
Sample SharePoint Framework client-side web part illustrating Site Provisioning using Microsoft Bot Framework.
Applies to
Solution
| Solution | Author(s) |
|---|---|
| js-bot-framework | Joseph Velliah (SPRIDER, @sprider) |
Version history
| Version | Date | Comments |
|---|---|---|
| 1.0 | December 13, 2016 | Initial release |
Disclaimer
THIS CODE IS PROVIDED AS IS WITHOUT WARRANTY OF ANY KIND, EITHER EXPRESS OR IMPLIED, INCLUDING ANY IMPLIED WARRANTIES OF FITNESS FOR A PARTICULAR PURPOSE, MERCHANTABILITY, OR NON-INFRINGEMENT.
Minimal Path to Awesome
- clone this repo
Register Bot
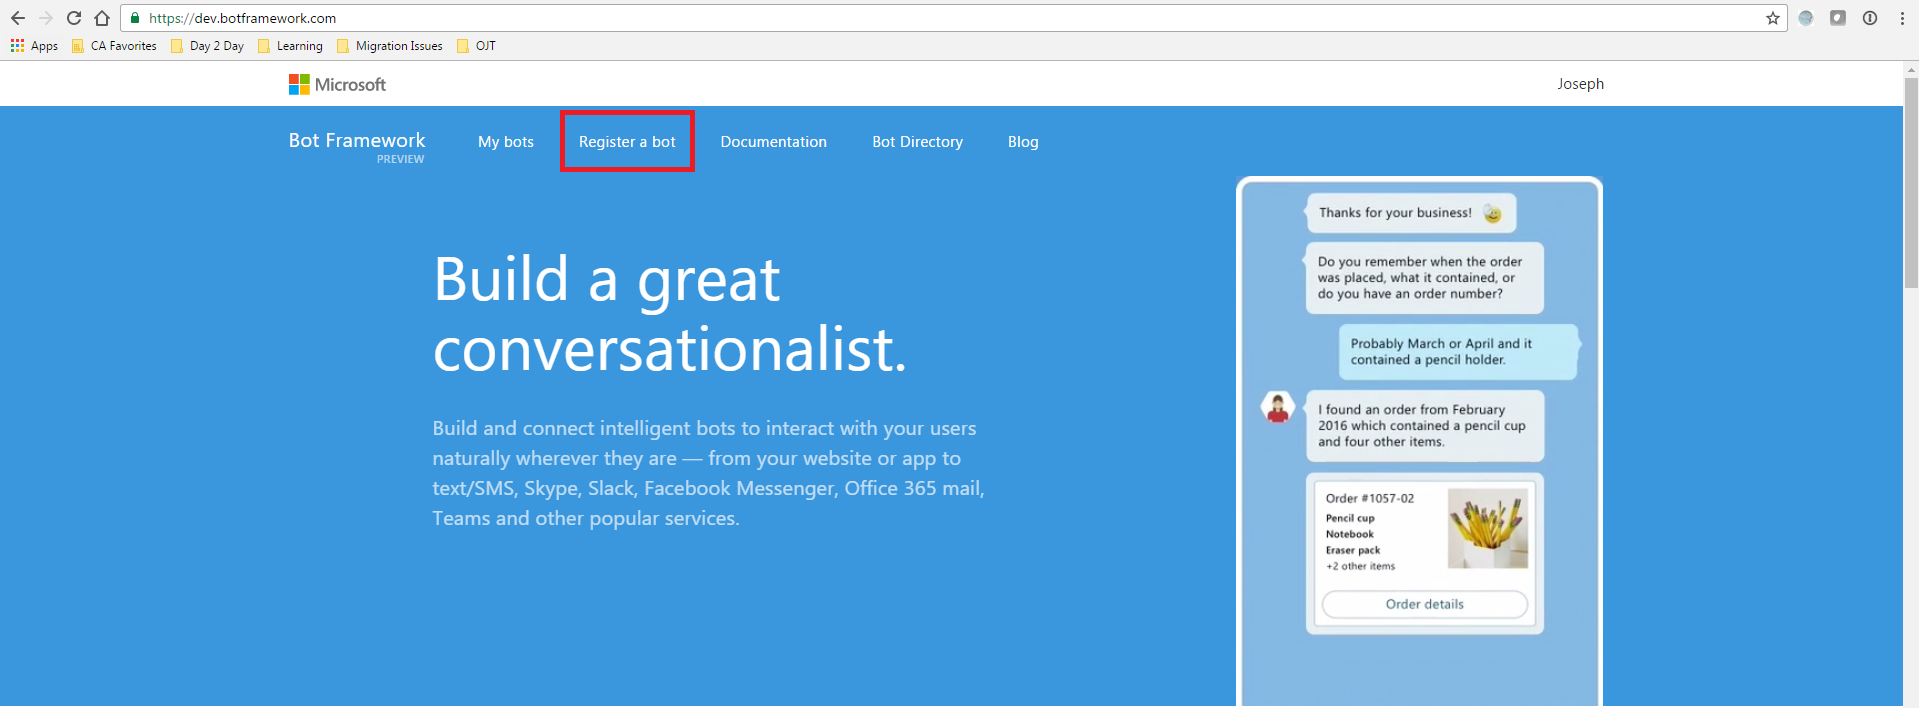
- go to https://dev.botframework.com/ and sign in with your Microsoft account
- click on Register a bot link at the top
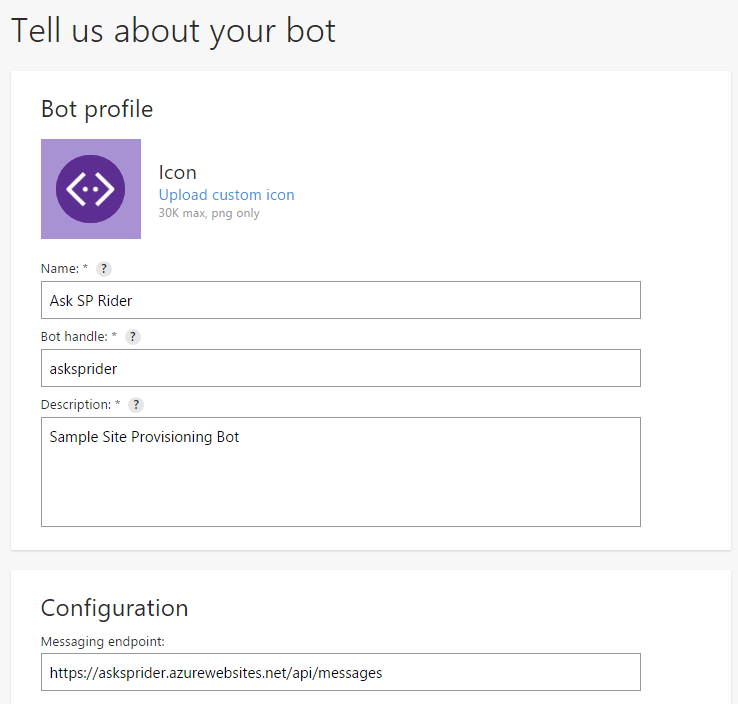
- fill all the details like Name, Bot handle, Description and Messaging endpoint
- generate a new App ID and password by clicking Create Microsoft App ID and password button. Save this value somewhere as we will use in this next step
- accept the terms and click Register
- your bot is now registered
- click edit link under Web Chat channel and notedown the Secret key to configure the client web part

- you can test your connection here by typing hello message and click Send. Try this step after completing "Publish Bot in Azure Web App" step
Publish Bot in Azure Web App
- in the Azure Management Portal at https://portal.azure.com create a new Web App(example: https://asksprider.azurewebsites.net/)
- download the publishing profile from the web app we just created. This will be used to publish the Bot in Azure using Visual Studio
- Open the web.config file in AskSPRider.sln and update the MicrosoftAppId, MicrosoftAppPassword, O365AdminId and O365AdminPassword
- MicrosoftAppId - App ID generated from Bot Registration Process
- MicrosoftAppPassword - App Secret generated from Bot Registration Process
- O365AdminId - SharePoint Online Admin User Id(example: user@tenant.onmicrosoft.com)
- O365AdminPassword - SharePoint Online Admin Password
- save the web.config file
- right click on the project and publish the bot in Azure using the publishing profile downloaded
Configure web part
- go to the working directory to the webpart folder in the command line run:
- npm i
- tsd install
- gulp serve
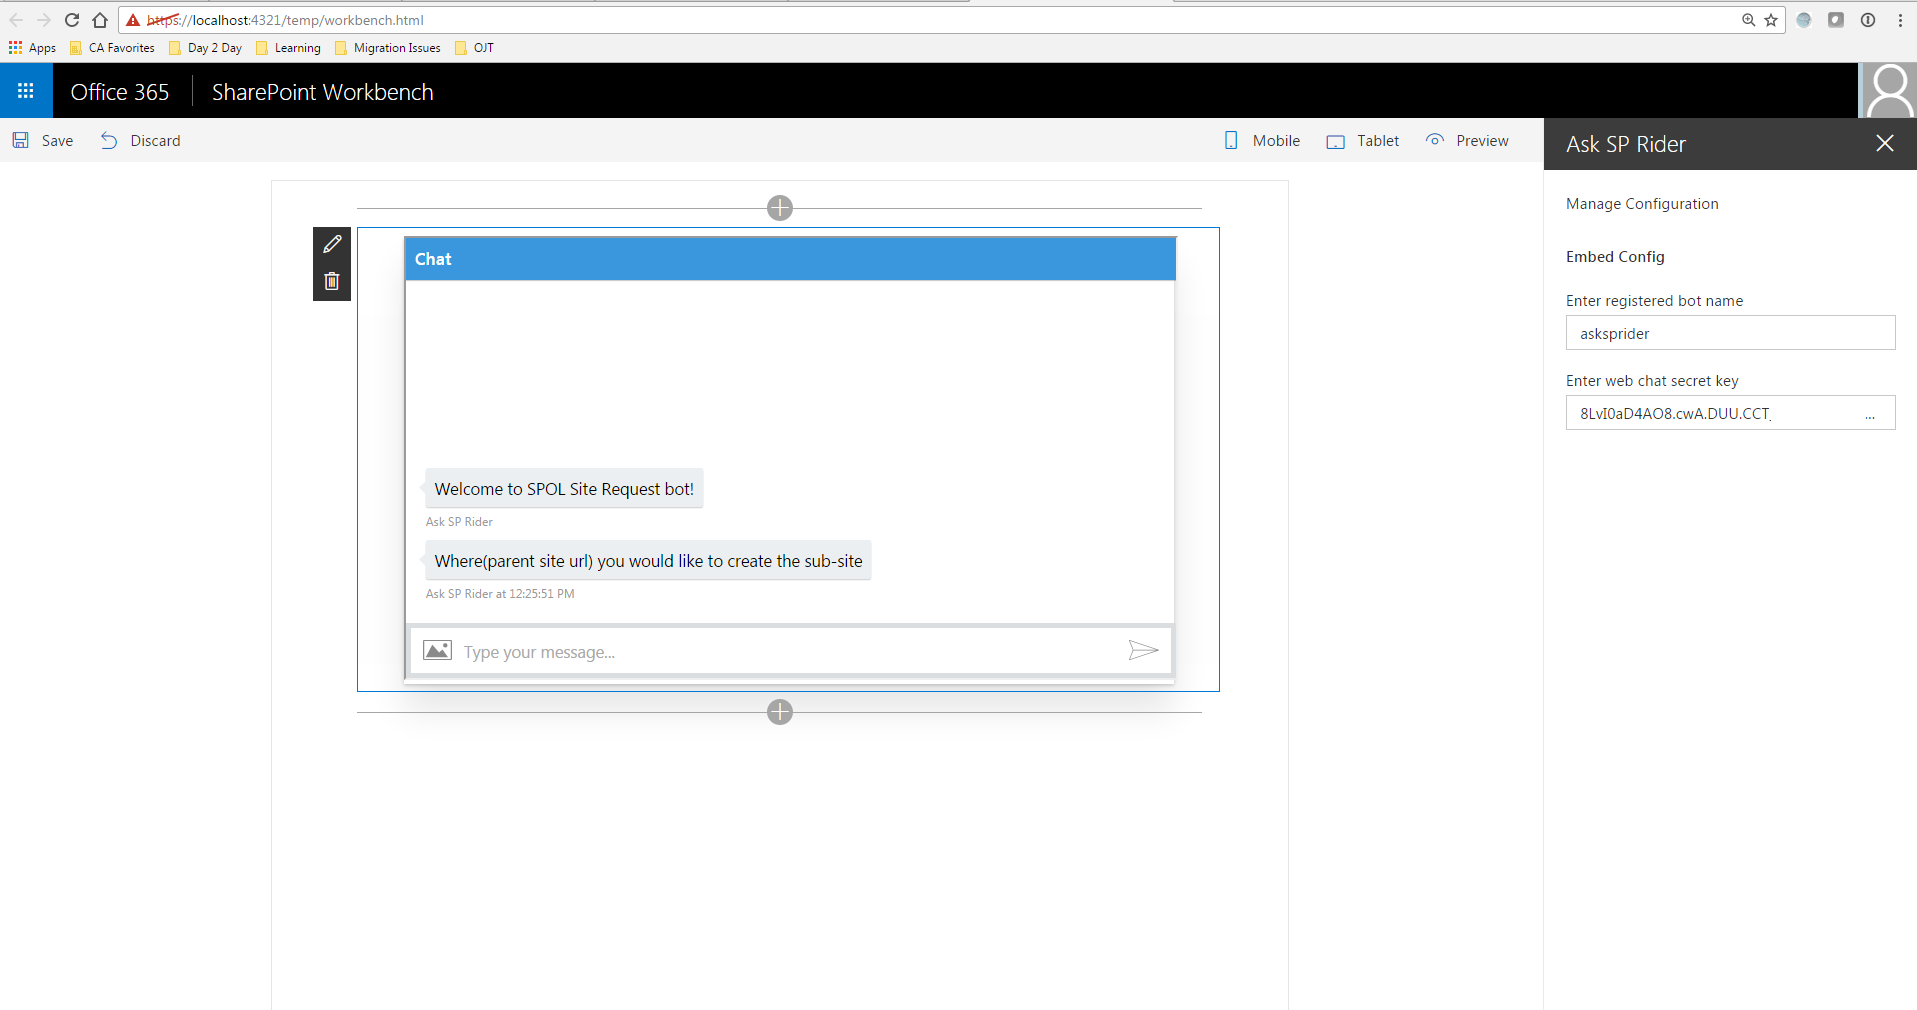
- add Ask SP Rider webpart and edit it
- configure bot name and web chat secret key
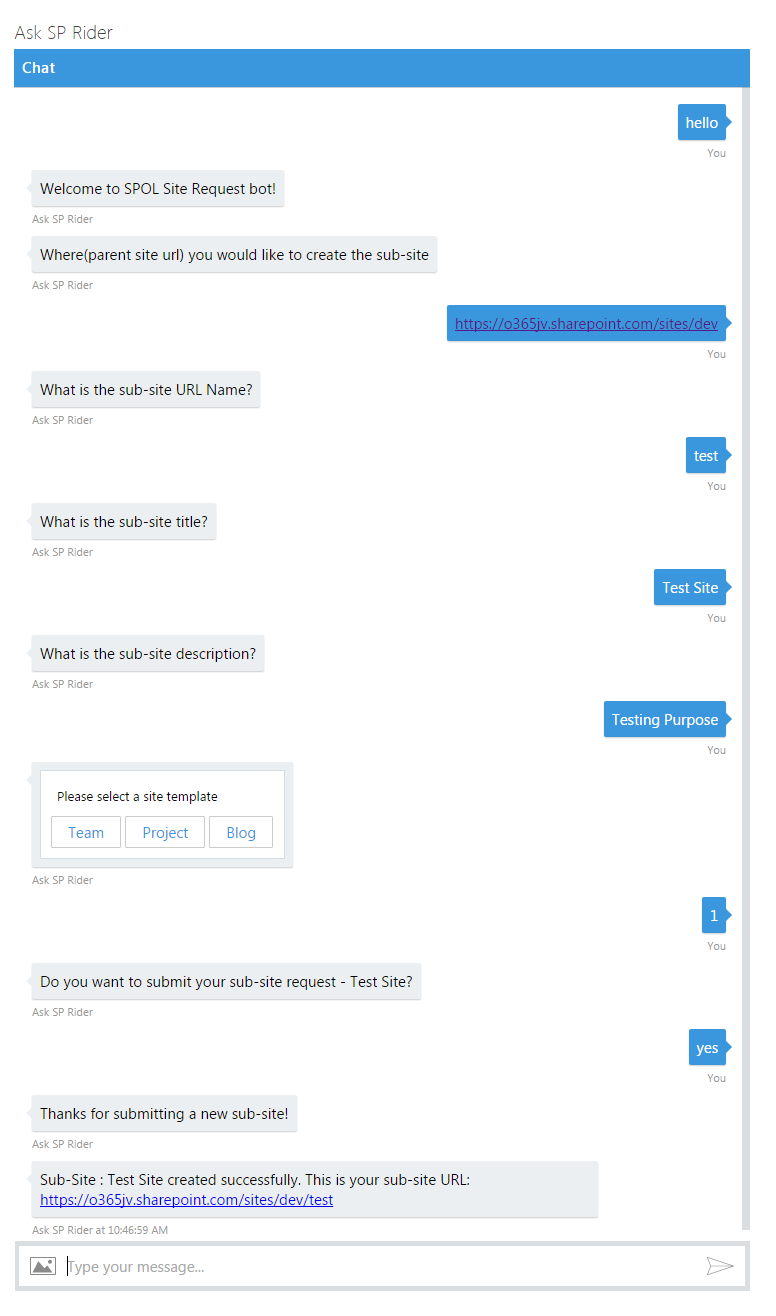
- type hello and proceed with site creation process
- configure bot name and web chat secret key
- final output
Features
This project illustrates the following concepts:
- connecting SharePoint Framework client-side web part to a custom bot
- showing how to embed bot within client-side web part
- how to create a sub-site by posting set of questions to the user via bot
- bot form field validations