|
|
||
|---|---|---|
| .. | ||
| assets | ||
| config | ||
| src | ||
| .editorconfig | ||
| .gitignore | ||
| .yo-rc.json | ||
| README.md | ||
| gulpfile.js | ||
| npm-shrinkwrap.json | ||
| package.json | ||
| tsconfig.json | ||
| tslint.json | ||
README.md
Google Fit information
Summary
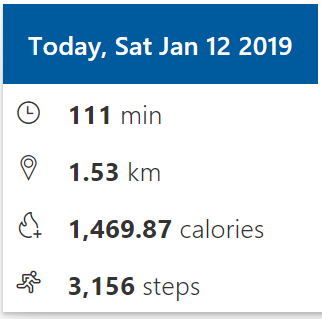
This sample demonstrates the integration of Google Fit information with SharePoint Framework. The Google Fitness REST APIs allows developers to extend it further and create their own dashboards. Google Fitness REST APIs are useful if you have fitness app and you want to integrate your data with google fit or if you just want to collect Fitness data and display some information to the users. This web part helps to display the key fitness information (activity time spent, distance travelled, calories burned, step count) from the Google fit data source.
Generate OAuth 2.0 client ID
In order to use Google REST APIs, we need to generate an OAuth 2.0 client ID. Follow below procedure to generate it.
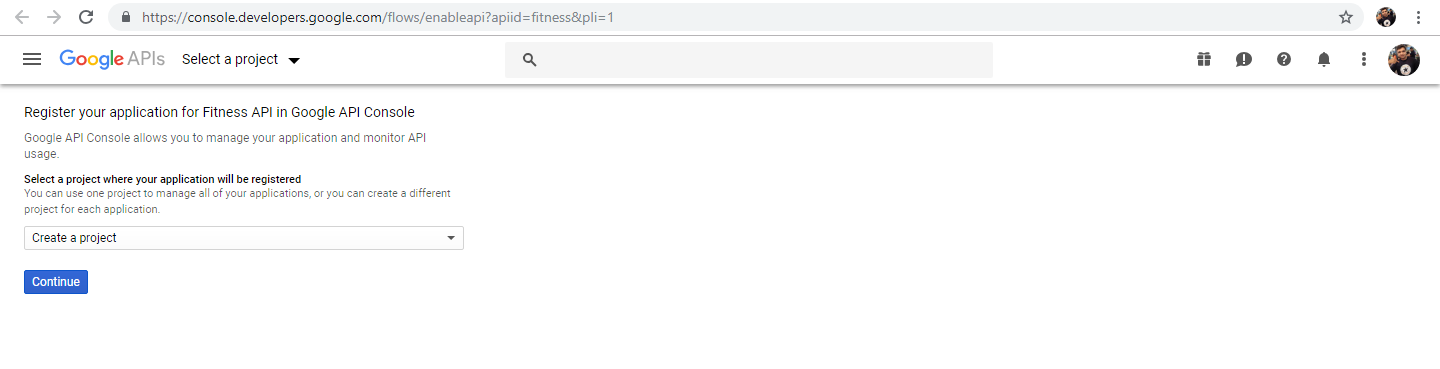
- Open Google API Console from here.
- Select any existing project or choose to create a new project.
- Click Continue.
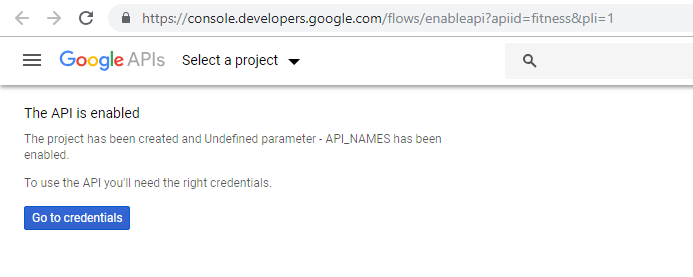
- Once the project is created, we will have to generate the credentials.
- Click "Go to credentials".
- Select the options as highlighted below:
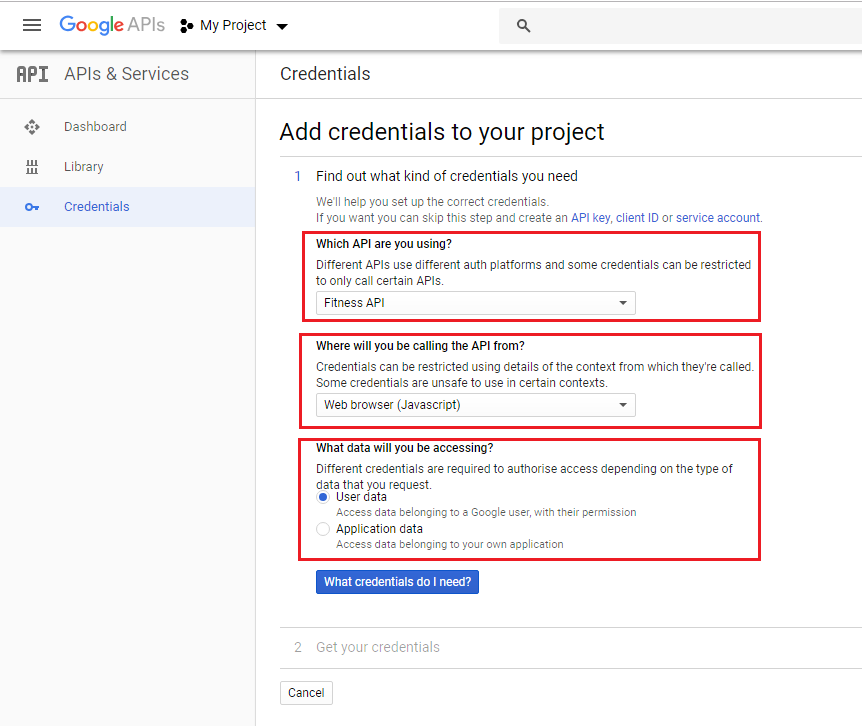
- Click "What credentials do I need?".
- Under Authorized JavaScript origins, add SharePoint Online site url (e.g. https://contoso.sharepoint.com) or https://localhost:4321, if you are using SharePoint local workbench.
- Under Authorized redirect URI, add https://localhost:4321/auth/google/callback, if you are using SharePoint local workbench.
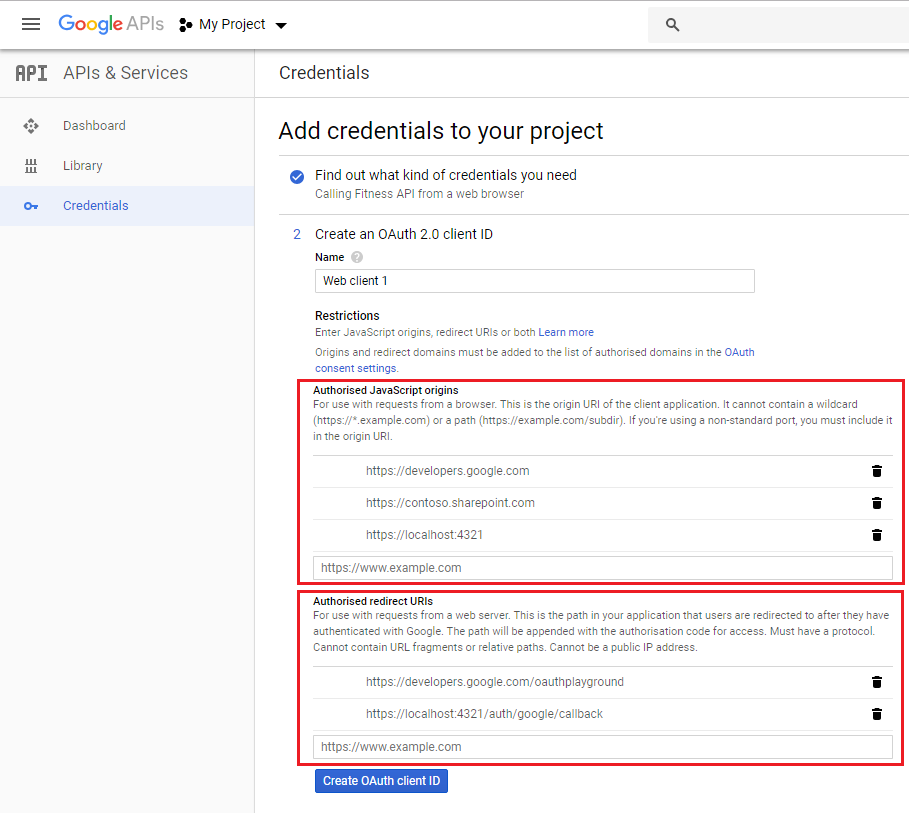
- Click "Create OAuth client ID".
- Set up the OAuth 2.0 consent screen.
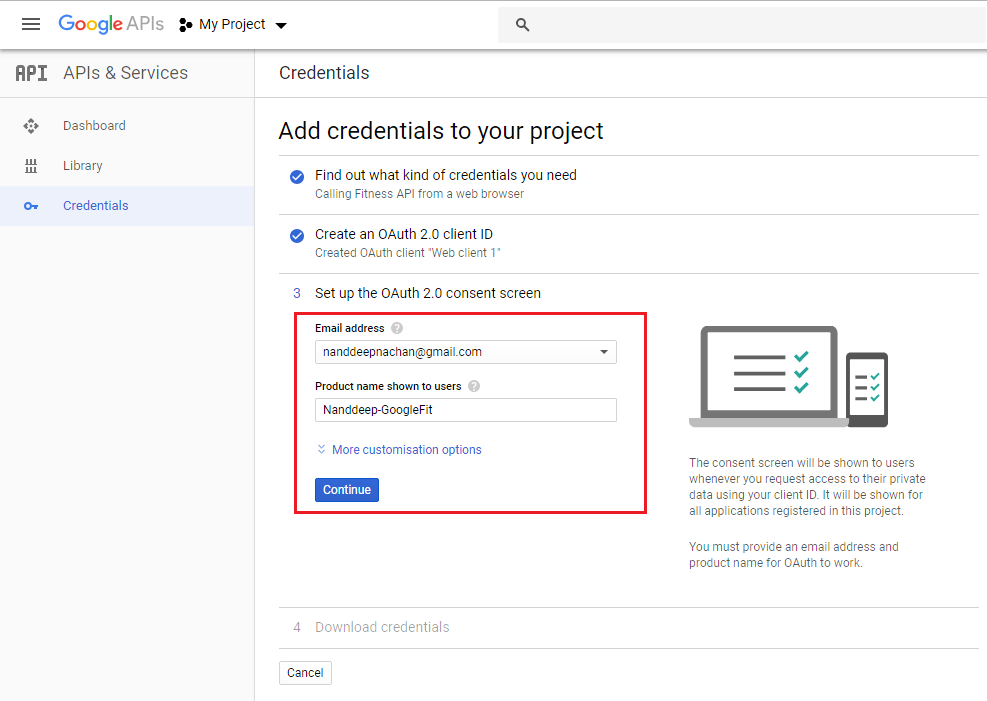
- Click Continue.
- The Client id will be generated. Note it down to use in web part property.
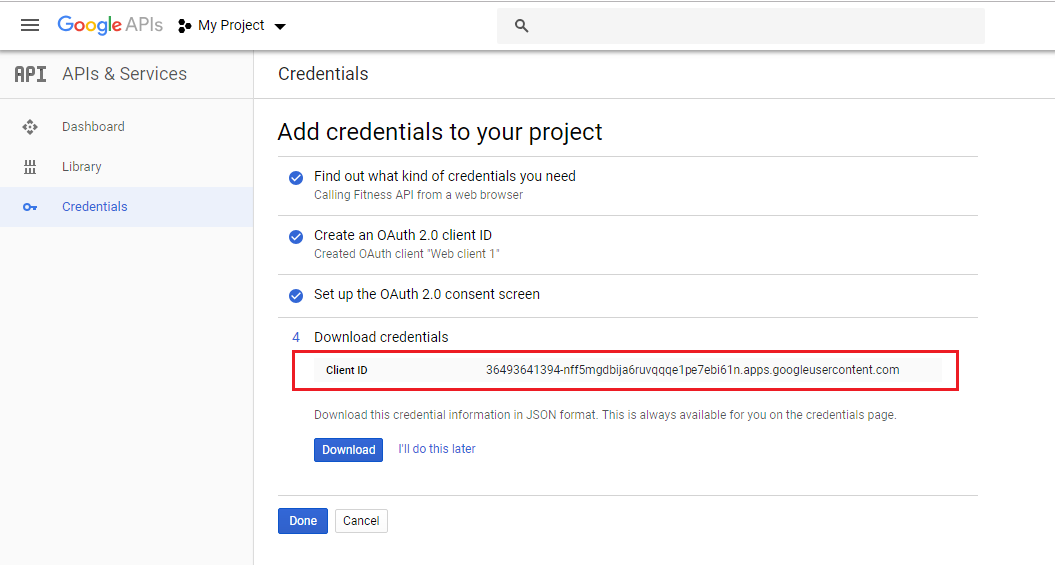
- Click Done.
Configure the Web Part to use
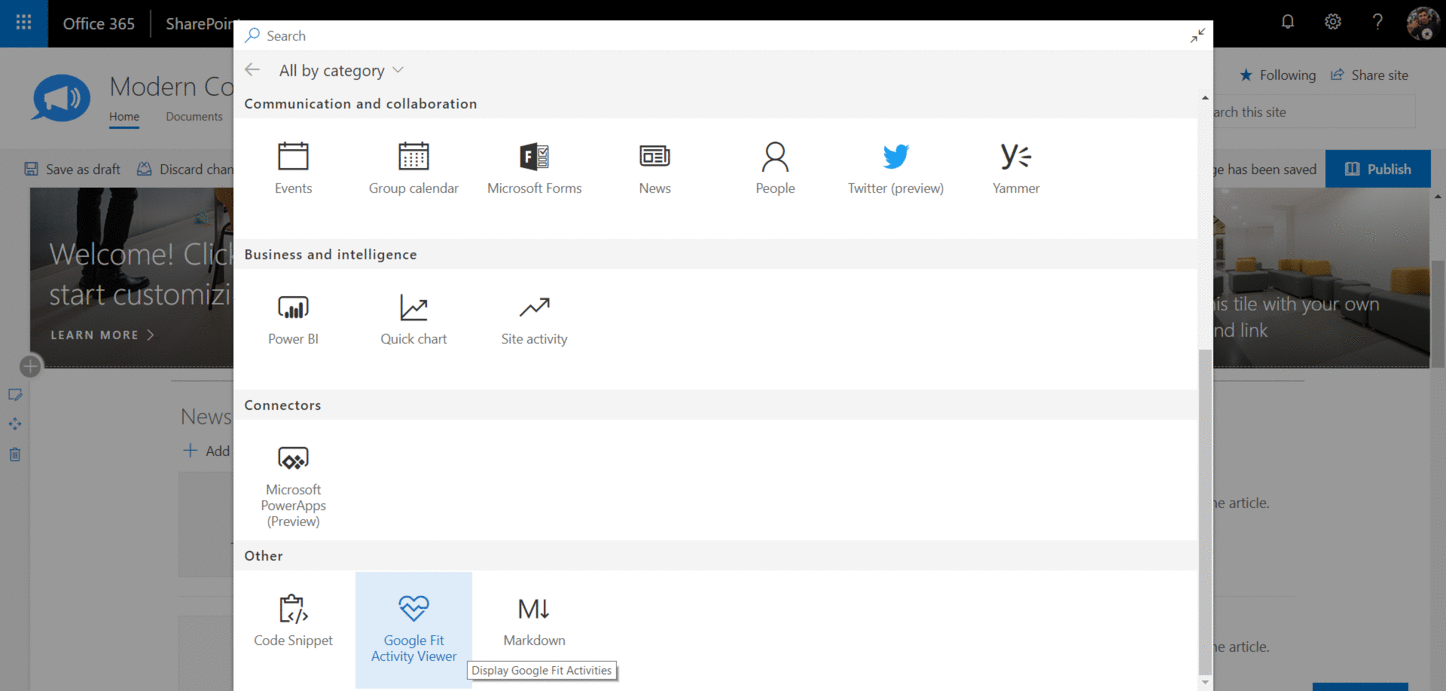
- Add "Google Fit Activity Viewer" web part on SharePoint page.
- Edit the web part.
- Add above generated OAuth 2.0 client ID to "ClientId Field" web part property.
- Save the changes.
NPM Packages Used
Below NPM package is used to develop this sample.
- react-google-authorize (https://www.npmjs.com/package/react-google-authorize)
Used SharePoint Framework Version
![]()
Applies to
Solution
| Solution | Author(s) |
|---|---|
| react-google-fit | Nanddeep Nachan (SharePoint Consultant, @NanddeepNachan) |
Version history
| Version | Date | Comments |
|---|---|---|
| 1.0.0 | January 14, 2019 | Initial release |
Disclaimer
THIS CODE IS PROVIDED AS IS WITHOUT WARRANTY OF ANY KIND, EITHER EXPRESS OR IMPLIED, INCLUDING ANY IMPLIED WARRANTIES OF FITNESS FOR A PARTICULAR PURPOSE, MERCHANTABILITY, OR NON-INFRINGEMENT.
Prerequisites
- SharePoint Online tenant
- Site Collection created under the /sites/ or /
Minimal Path to Awesome
- Clone this repo
- npm i
- gulp serve --nobrowser
- Open workbench on your tenant, i.e. https://contoso.sharepoint.com/sites/salesteam/_layouts/15/workbench.aspx
- Search and add web part "Google Fit Activity Viewer"
Features
This sample web part shows how adaptive cards can be used effectively with SharePoint Framework to render an image gallery with data stored in a SharePoint list.
- Integrating Google Fit information
- Consuming Google Fit REST APIs
- Creating extensible services
- Using @react-google-authorize