|
|
||
|---|---|---|
| .. | ||
| api | ||
| assets | ||
| webpart | ||
| README.md | ||
README.md
Communicate using elevated privileges with SharePoint
Summary
Sample SharePoint Framework client-side web part illustrating communication with SharePoint using elevated privileges through a custom Web API.
Applies to
Solution
| Solution | Author(s) |
|---|---|
| react-sp-elevatedprivileges | Waldek Mastykarz (MVP, Rencore, @waldekm) |
Version history
| Version | Date | Comments |
|---|---|---|
| 1.0 | October 12, 2016 | Initial release |
Disclaimer
THIS CODE IS PROVIDED AS IS WITHOUT WARRANTY OF ANY KIND, EITHER EXPRESS OR IMPLIED, INCLUDING ANY IMPLIED WARRANTIES OF FITNESS FOR A PARTICULAR PURPOSE, MERCHANTABILITY, OR NON-INFRINGEMENT.
Minimal Path to Awesome
- clone this repo
Deploy custom Web API
- in the Azure Management Portal at https://portal.azure.com create a new API App
- in the settings enable CORS for all origins using an
* - copy the URL of the API App
- in the settings enable CORS for all origins using an
- in your SharePoint site
- create a new list called Tasks
- navigate to https://yourtenant.sharepoint.com/_layouts/15/appregnew.aspx
- generate client ID and copy it
- generate client secret and copy it
- as the name use: SPFx sample elevated privileges
- as the URL use the URL of the Azure API App created previously
- as the domain use the host name of the Azure API App
- navigate to https://yourtenant.sharepoint.com/_layouts/15/appinv.aspx
- lookup the newly registered Add-in using the client ID you copied
- in the Permissions field past the following code:
<AppPermissionRequests AllowAppOnlyPolicy="true">
  <AppPermissionRequest Scope="http://sharepoint/content/sitecollection/web/list" Right="Write" />
</AppPermissionRequests>
- after confirming the changes, when prompted, select the previously created Tasks list
- from the api folder, in Visual Studio open the pnp.api.elevatedprivileges.sln file
- in the web.config file
- update the value of the clientId setting with the previously copied client ID
- update the value of the clientSecret setting with the previously copied client secret
- update hte value of the siteUrl setting with the URL of your SharePoint site
- if you named your list other than Tasks update the value of the listName property with the name of your list
- build the solution
- deploy the pnp.api.elevatedprivileges project to the newly created API App
- verify that you can access the API by navigating in your web browser to https://your-api-app.azurewebsites.net/api/items
- you should get an error that GET is not a supported method
Configure web part
- in the command line
- change the working directory to the webpart folder
- run
npm i
- in your code editor open the webpart folder
- in the ./src/webparts/createTask/components/CreateTask.tsx file
- in line 76 replace the URL with the URL of your API App
- in the command line execute
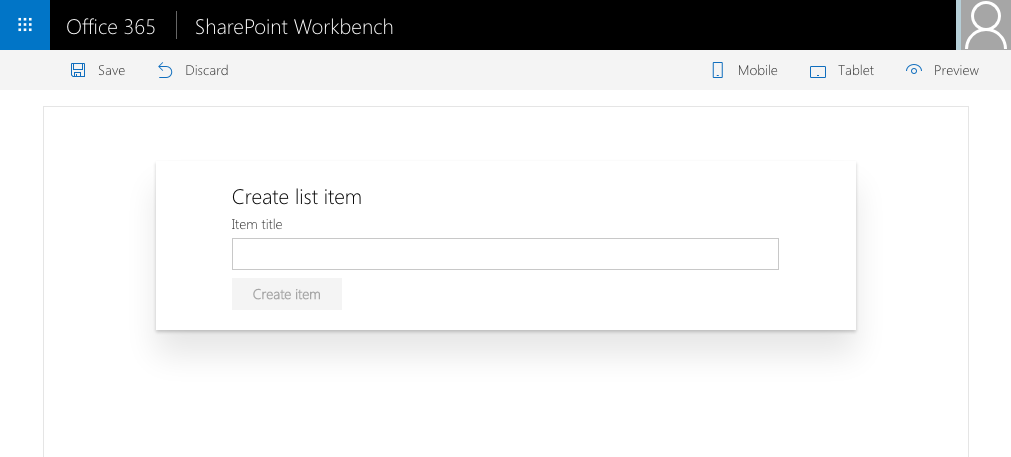
gulp serve - add the web part to SharePoint workbench
- enter the name of the new item and click the Create button
- verify that a new item with the name you specified has been created in the Tasks list
Features
This project contains sample Web API using app-only permissions to create items in a specific SharePoint list, and a client-side web part connected to that API.
This project illustrates the following concepts:
- elevating user privileges for communicating with SharePoint through a custom Web API
- connecting SharePoint Framework client-side web part to a custom Web API hosted in Azure
- persisting state in React components
- communicating state updates in React components to users
- executing REST API web requests from React components
- using Office UI Fabric React components in SharePoint Framework client-side web parts
- using form controls in Rest components