Service Health for Microsoft 365
Summary
Contains SPFx web part & Azure Function with below functionalities
- Azure Function to get the health status of all the M365 services using delegate or application permission.
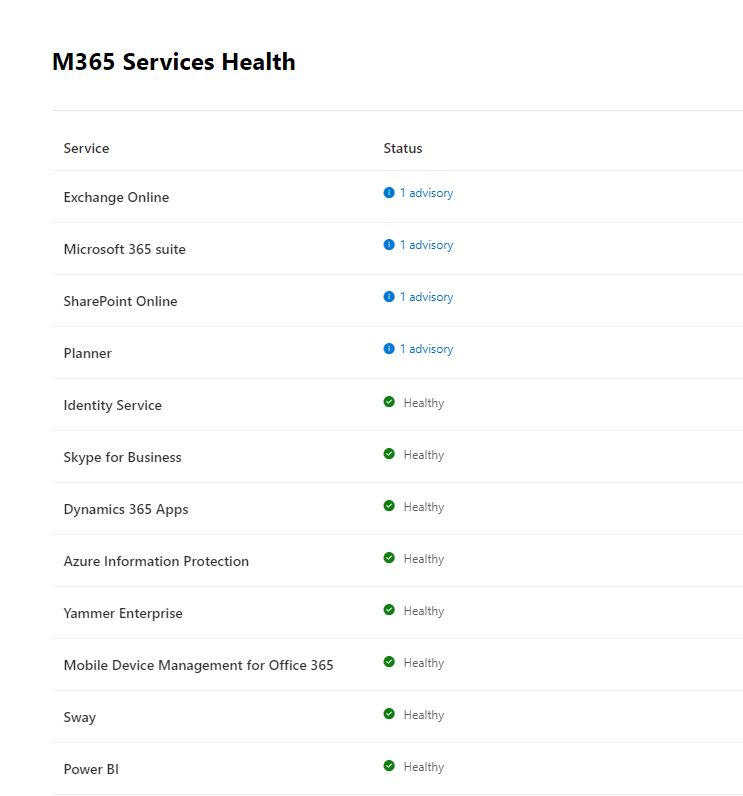
- SPFx web part shows the health status for all the M365 services.
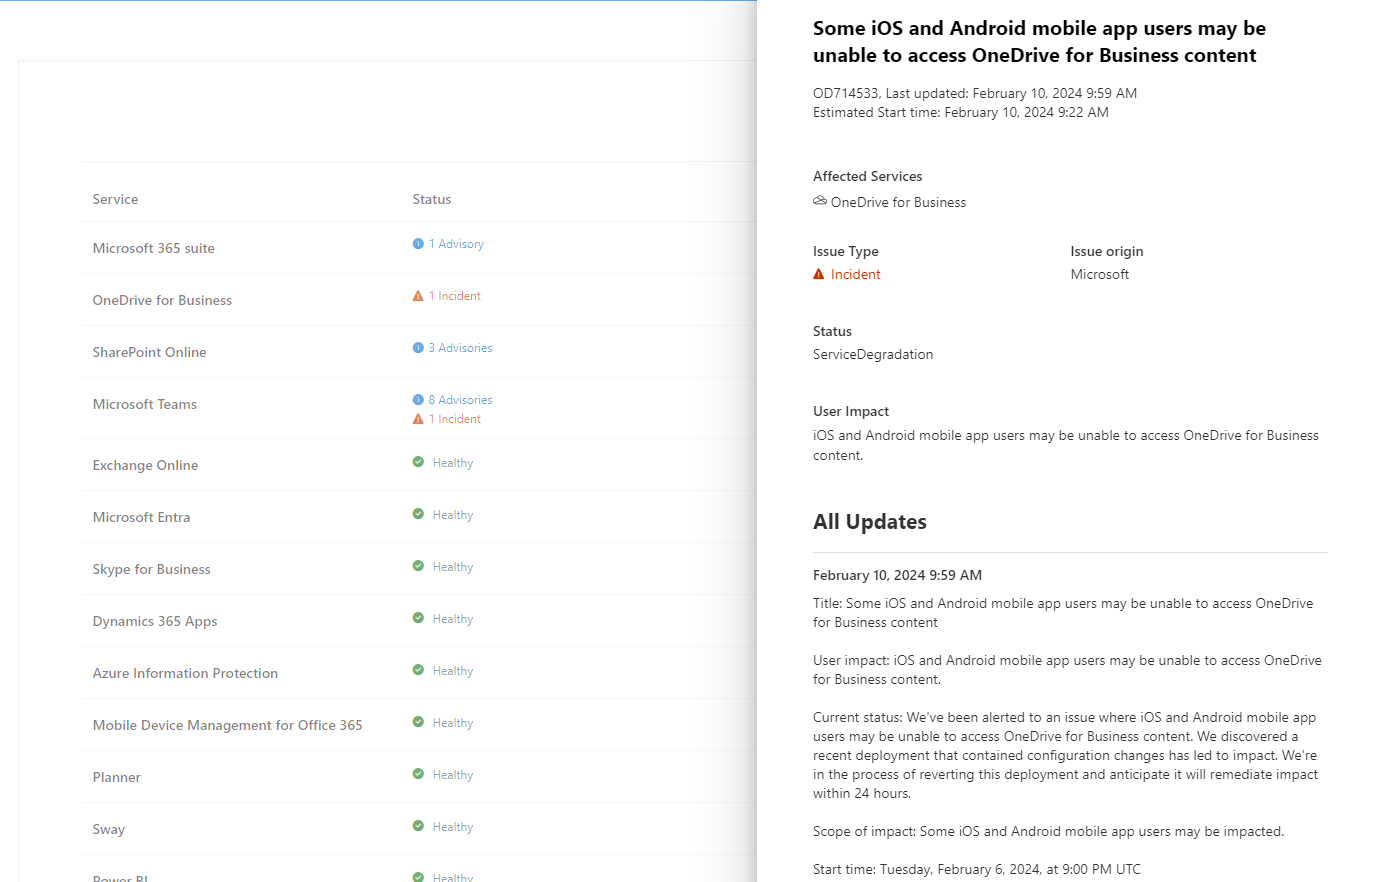
- SPFx web part shows the complete details including all the updates for all the impacted services.
Compatibility
| ⚠️ Important |
|---|
| Every SPFx version is only compatible with specific version(s) of Node.js. In order to be able to build this sample, please ensure that the version of Node on your workstation matches one of the versions listed in this section. This sample will not work on a different version of Node. |
| Refer to https://aka.ms/spfx-matrix for more information on SPFx compatibility. |
This sample is optimally compatible with the following environment configuration:
For more information about SPFx compatibility, please refer to https://aka.ms/spfx-matrix
Applies to
Get your own free development tenant by subscribing to Microsoft 365 developer program
Prerequisites
- SharePoint Online tenant
- Valid Azure subscription
Steps to follow:
-
Entra ID App Registration:
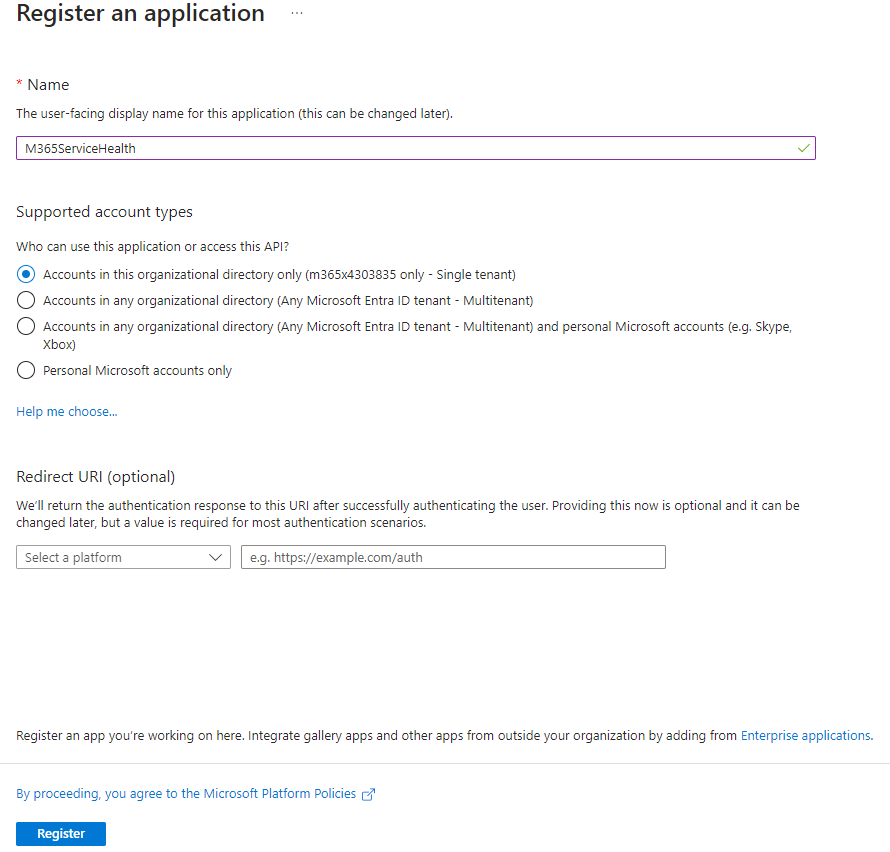
- Register new Entra ID App in Azure portal.
- Select App registrations.
- Select New registration.
- For Supported account types, select Accounts in this organization directory only. Leave the other options as is.
- Select Register.
-
After registering the application, you can find the application (client) ID and Directory (tenant) ID from the overview menu option of Entra ID App. Make a note of the values for use later.
-
Select Certificates & Secrets in the manage section of Entra ID app created and select New Client Secret. Select Recommended 6 months in the Expires field. This new secret will be valid for six months. You can also choose different values such as:
- 03 months
- 12 months
- 24 months
- Custom start date and end date.
-
Select API Permissions option of Entra ID app created.
-
Select Add a permission.
-
Select Microsoft Graph and add permissions as per below:
- Select Delegate permissions and then select ServiceHealth.Read.All, if you want to run the Service health web part based on user permssions. User must have 'Message center Reader' role to access the service health status.
- Select Application permissions and then select ServiceHealth.Read.All, if you want to run the Service health web part in elevated permissions mode.
-
Select Expose an API and Select Add next to Application ID URI. You can use the default value of api:// or another supported App ID URI pattern.Make a note of the applicaiton ID URI for use later.
-
Azure Function App Deployment: Azure Function can be deployed using Visual Studio or Visual Studio code. Alternatively PowerShell can be used to deploy the Azure Function and to configure the required configuration settings. Below are the steps required to deploy Azure function:
- Open AzureFunctionDeployment.ps1.
- Update the required variables and execute the PowerShell script. Please note that provided PowerShell use Azure-CLI commands.
-
SPFx configuration
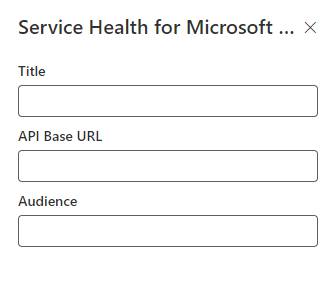
- You have to provide permission in SharePoint admin for accessing azure function on behalf of your solution. You can do it before deployment as proactive steps, or after deployment. You can refer to steps about how to do this post-deployment. You have to use API Access Page of SharePoint admin and add below permission for our use case.
"webApiPermissionRequests": [
      {
        "resource": <Replace with Application ID URI created during `Expose an API' step>,
        "scope": "ServiceHealth.Read.All"
      }
    ]
Contributors
Version history
| Version | Date | Comments |
|---|---|---|
| 1.0 | February 15, 2023 | Initial release |
| 2.0 | February 10, 2024 | Implementation using Azure Function |
| 3.0 | September 05, 2024 | Bug fix and SPFx version upgrade |
| 3.1 | October 05, 2024 | SPFx version upgrade |
Minimal Path to Awesome
- Clone this repository (or download this solution as a .ZIP file then unzip it)
- From your command line, change your current directory to the directory containing this sample (
react-m365-services-health, located undersamples) - in the command line run:
npm installgulp serve
This sample can also be opened with VS Code Remote Development. Visit https://aka.ms/spfx-devcontainer for further instructions.
Features
- Show the health status for all the M365 services
- Complete details including all the updates for all the impacted services
References
- Getting started with SharePoint Framework
- Building for Microsoft teams
- Use Microsoft Graph in your solution
- Publish SharePoint Framework applications to the Marketplace
- Microsoft 365 Patterns and Practices - Guidance, tooling, samples and open-source controls for your Microsoft 365 development
Help
We do not support samples, but this community is always willing to help, and we want to improve these samples. We use GitHub to track issues, which makes it easy for community members to volunteer their time and help resolve issues.
If you're having issues building the solution, please run spfx doctor from within the solution folder to diagnose incompatibility issues with your environment.
You can try looking at issues related to this sample to see if anybody else is having the same issues.
You can also try looking at discussions related to this sample and see what the community is saying.
If you encounter any issues using this sample, create a new issue.
For questions regarding this sample, create a new question.
Finally, if you have an idea for improvement, make a suggestion.
Disclaimer
THIS CODE IS PROVIDED AS IS WITHOUT WARRANTY OF ANY KIND, EITHER EXPRESS OR IMPLIED, INCLUDING ANY IMPLIED WARRANTIES OF FITNESS FOR A PARTICULAR PURPOSE, MERCHANTABILITY, OR NON-INFRINGEMENT.


-Incompatible-red.svg)


