13 KiB
| id | title |
|---|---|
| index | Quickstart |
This quickstart gets you started with Apache Druid using the micro-quickstart startup configuration and introduces you to some Druid features, including the MSQ task engine that's part of the multi-stage query architecture.
With the MSQ task engine, you can write query tasks that can reference external data as well as perform ingestion with SQL INSERT and REPLACE, eliminating the need to generate JSON-based ingestion specs.
In this quickstart, you'll do the following:
- install Druid
- start up Druid services
- use the MSQ task engine to ingest data
Druid supports different ingestion engines. While we recommend SQL based ingestion, you can find tutorials for other modes of ingestion, such as Load data with native batch ingestion.
Requirements
You can follow these steps on a relatively small machine, such as a laptop with around 4 CPU and 16 GiB of RAM.
Druid comes equipped with several startup configuration profiles for a range of machine sizes.
The micro-quickstart configuration profile is suitable for evaluating Druid. If you want to
try out Druid's performance or scaling capabilities, you'll need a larger machine and configuration profile.
The configuration profiles included with Druid range from the even smaller Nano-Quickstart configuration (1 CPU, 4GiB RAM) to the X-Large configuration (64 CPU, 512GiB RAM). For more information, see Single server deployment. For information on deploying Druid services across clustered machines, see Clustered deployment.
The software requirements for the installation machine are:
- Linux, Mac OS X, or other Unix-like OS (Windows is not supported)
- Java 8, Update 92 or later (8u92+) or Java 11
Druid relies on the environment variables
JAVA_HOMEorDRUID_JAVA_HOMEto find Java on the machine. You can setDRUID_JAVA_HOMEif there is more than one instance of Java. To verify Java requirements for your environment, run thebin/verify-javascript.
Before installing a production Druid instance, be sure to consider the user account on the operating system under which Druid will run. This is important because any Druid console user will have, effectively, the same permissions as that user. For example, the file browser UI will show console users the files that the underlying user can access. In general, avoid running Druid as root user. Consider creating a dedicated user account for running Druid.
Install Druid
Download the {{DRUIDVERSION}} release from Apache Druid. For this quickstart, you need Druid version 24.0 or higher. For versions earlier than 24.0 (0.23 and below), see Load data with native batch ingestion.
In your terminal, extract the file and change directories to the distribution directory:
tar -xzf apache-druid-{{DRUIDVERSION}}-bin.tar.gz
cd apache-druid-{{DRUIDVERSION}}
The distribution directory contains LICENSE and NOTICE files and subdirectories for executable files, configuration files, sample data and more.
Start up Druid services
Start up Druid services using the micro-quickstart single-machine configuration.
This configuration includes default settings that are appropriate for this tutorial, such as loading the druid-multi-stage-query extension by default so that you can use the MSQ task engine.
You can view that setting and others in the configuration files in the conf/druid/single-server/micro-quickstart/.
From the apache-druid-{{DRUIDVERSION}} package root, run the following command:
./bin/start-micro-quickstart
This brings up instances of ZooKeeper and the Druid services:
$ ./bin/start-micro-quickstart
[Thu Sep  8 18:30:00 2022] Starting Apache Druid.
[Thu Sep  8 18:30:00 2022] Open http://localhost:8888/ in your browser to access the web console.
[Thu Sep  8 18:30:00 2022] Or, if you have enabled TLS, use https on port 9088.
[Thu Sep  8 18:30:00 2022] Running command[zk], logging to[/apache-druid-{{DRUIDVERSION}}/var/sv/zk.log]: bin/run-zk conf
[Thu Sep  8 18:30:00 2022] Running command[coordinator-overlord], logging to[/apache-druid-{{DRUIDVERSION}}/var/sv/coordinator-overlord.log]: bin/run-druid coordinator-overlord conf/druid/single-server/micro-quickstart
[Thu Sep  8 18:30:00 2022] Running command[broker], logging to[/apache-druid-{{DRUIDVERSION}}/var/sv/broker.log]: bin/run-druid broker conf/druid/single-server/micro-quickstart
[Thu Sep  8 18:30:00 2022] Running command[router], logging to[/apache-druid-{{DRUIDVERSION}}/var/sv/router.log]: bin/run-druid router conf/druid/single-server/micro-quickstart
[Thu Sep  8 18:30:00 2022] Running command[historical], logging to[/apache-druid-{{DRUIDVERSION}}/var/sv/historical.log]: bin/run-druid historical conf/druid/single-server/micro-quickstart
[Thu Sep  8 18:30:00 2022] Running command[middleManager], logging to[/apache-druid-{{DRUIDVERSION}}/var/sv/middleManager.log]: bin/run-druid middleManager conf/druid/single-server/micro-quickstart
All persistent state, such as the cluster metadata store and segments for the services, are kept in the var directory under
the Druid root directory, apache-druid-{{DRUIDVERSION}}. Each service writes to a log file under var/sv.
At any time, you can revert Druid to its original, post-installation state by deleting the entire var directory. You may want to do this, for example, between Druid tutorials or after experimentation, to start with a fresh instance.
To stop Druid at any time, use CTRL+C in the terminal. This exits the bin/start-micro-quickstart script and terminates all Druid processes.
Open the Druid console
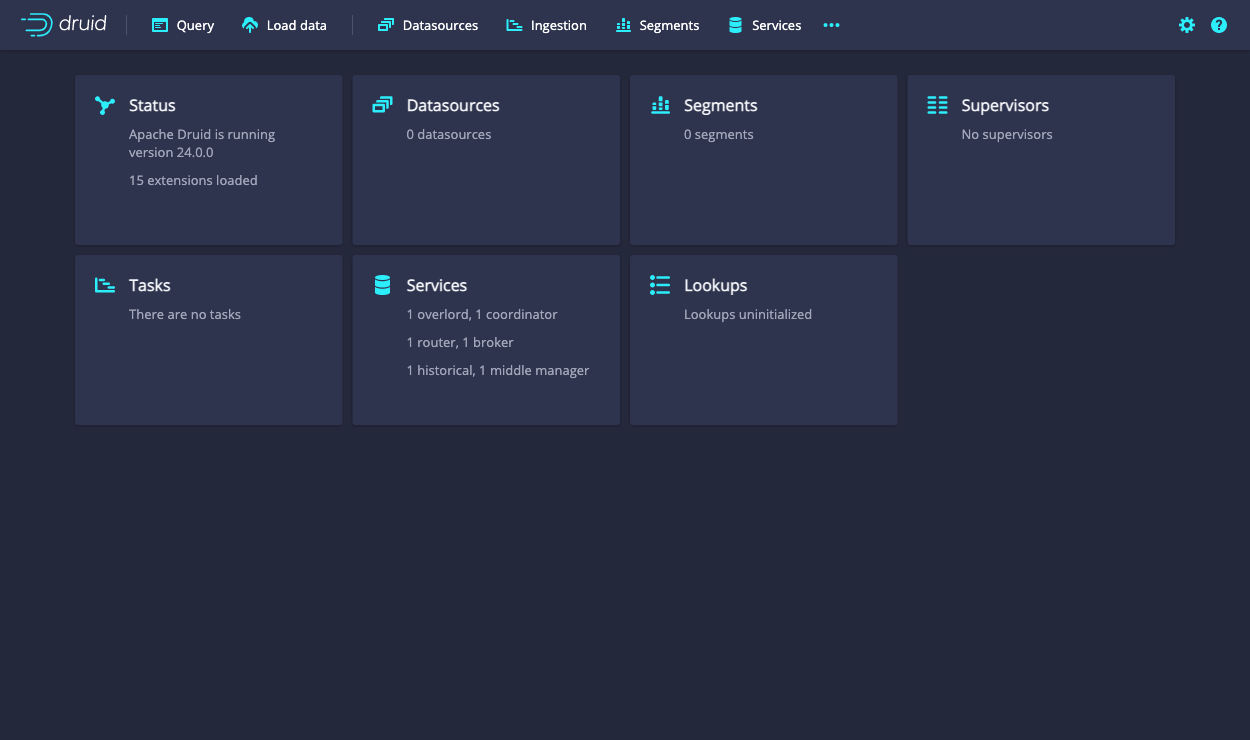
After the Druid services finish startup, open the Druid console at http://localhost:8888.
It may take a few seconds for all Druid services to finish starting, including the Druid router, which serves the console. If you attempt to open the Druid console before startup is complete, you may see errors in the browser. Wait a few moments and try again.
In this quickstart, you use the the Druid console to perform ingestion. The MSQ task engine specifically uses the Query view to edit and run SQL queries. For a complete walkthrough of the Query view as it relates to the multi-stage query architecture and the MSQ task engine, see UI walkthrough.
Load data
The Druid distribution bundles the wikiticker-2015-09-12-sampled.json.gz sample dataset that you can use for testing. The sample dataset is located in the quickstart/tutorial/ folder, accessible from the Druid root directory, and represents Wikipedia page edits for a given day.
Follow these steps to load the sample Wikipedia dataset:
-
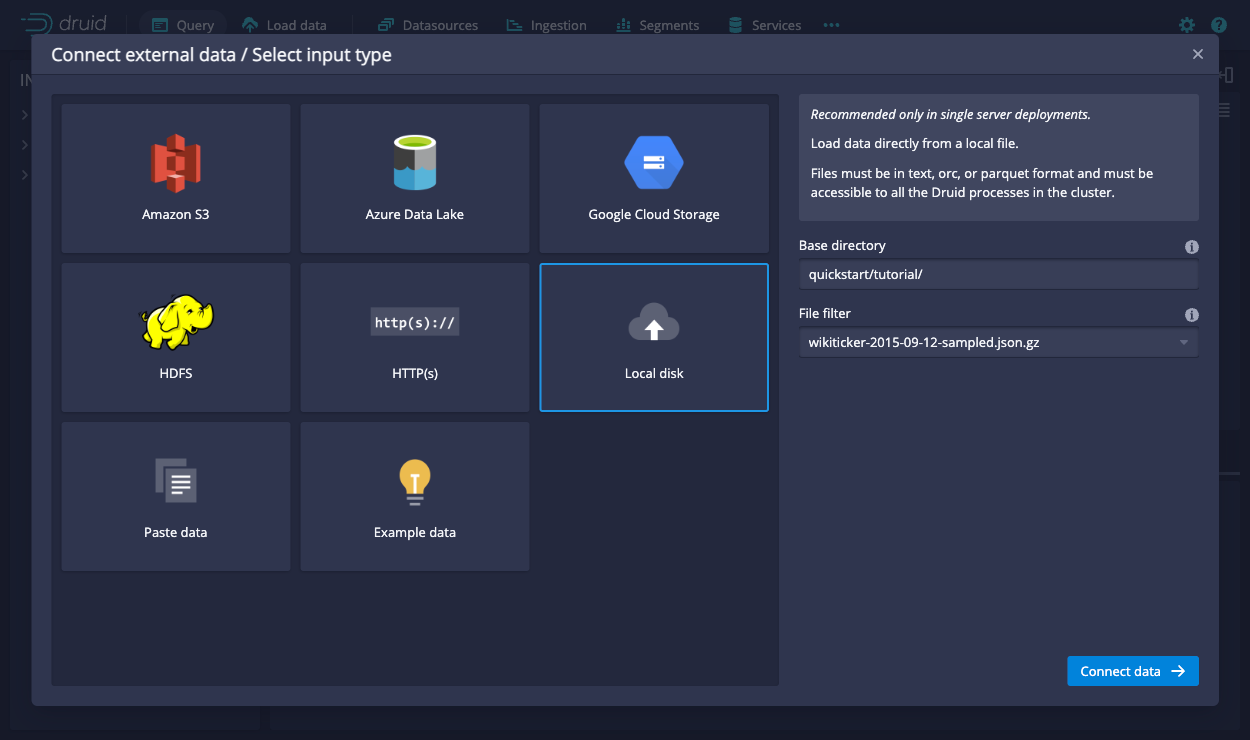
In the Query view, click Connect external data.
-
Select the Local disk tile and enter the following values:
-
Base directory:
quickstart/tutorial/ -
File filter:
wikiticker-2015-09-12-sampled.json.gz
Entering the base directory and wildcard file filter separately, as afforded by the UI, allows you to specify multiple files for ingestion at once.
-
-
Click Connect data.
-
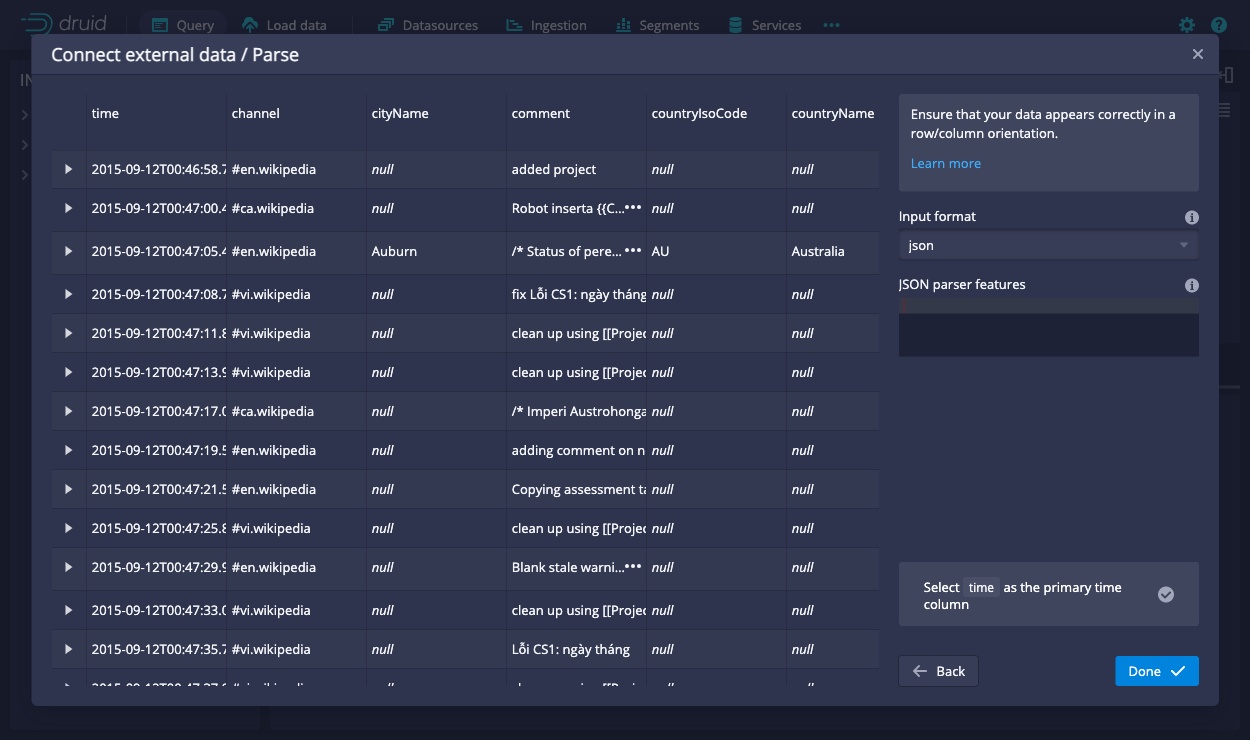
On the Parse page, you can examine the raw data and perform the following optional actions before loading data into Druid:
- Expand a row to see the corresponding source data.
- Customize how the data is handled by selecting from the Input format options.
- Adjust the primary timestamp column for the data.
Druid requires data to have a primary timestamp column (internally stored in a column called
__time). If your dataset doesn't have a timestamp, Druid uses the default value of1970-01-01 00:00:00.
-
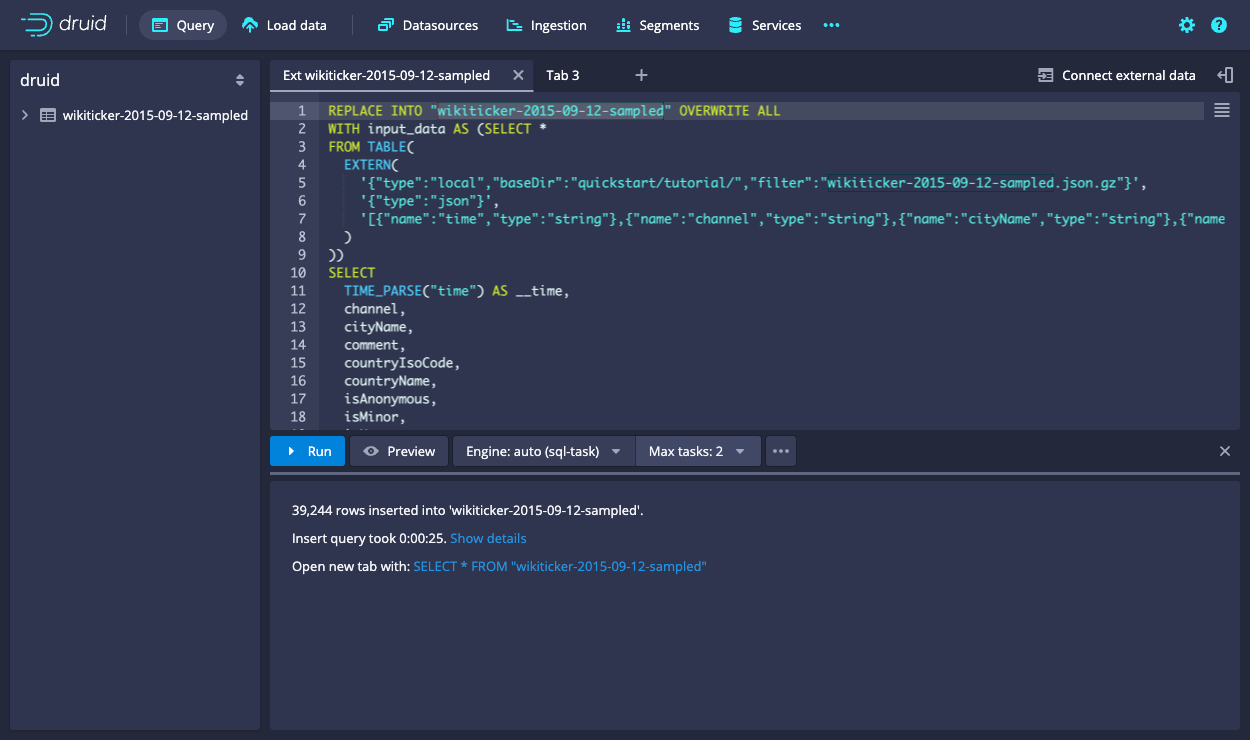
Click Done. You're returned to the Query view that displays the newly generated query. The query inserts the sample data into the table named
wikiticker-2015-09-12-sampled.Show the query
REPLACE INTO "wikiticker-2015-09-12-sampled" OVERWRITE ALL WITH input_data AS (SELECT * FROM TABLE( EXTERN( '{"type":"local","baseDir":"quickstart/tutorial/","filter":"wikiticker-2015-09-12-sampled.json.gz"}', '{"type":"json"}', '[{"name":"time","type":"string"},{"name":"channel","type":"string"},{"name":"cityName","type":"string"},{"name":"comment","type":"string"},{"name":"countryIsoCode","type":"string"},{"name":"countryName","type":"string"},{"name":"isAnonymous","type":"string"},{"name":"isMinor","type":"string"},{"name":"isNew","type":"string"},{"name":"isRobot","type":"string"},{"name":"isUnpatrolled","type":"string"},{"name":"metroCode","type":"long"},{"name":"namespace","type":"string"},{"name":"page","type":"string"},{"name":"regionIsoCode","type":"string"},{"name":"regionName","type":"string"},{"name":"user","type":"string"},{"name":"delta","type":"long"},{"name":"added","type":"long"},{"name":"deleted","type":"long"}]' ) )) SELECT TIME_PARSE("time") AS __time, channel, cityName, comment, countryIsoCode, countryName, isAnonymous, isMinor, isNew, isRobot, isUnpatrolled, metroCode, namespace, page, regionIsoCode, regionName, user, delta, added, deleted FROM input_data PARTITIONED BY DAY -
Optionally, click Preview to see the general shape of the data before you ingest it.
-
Click Run to execute the query. The task may take a minute or two to complete. When done, the task displays its duration and the number of rows inserted into the table. The view is set to automatically refresh, so you don't need to refresh the browser to see the status change.
A successful task means that Druid data servers have picked up one or more segments.
Query data
Once the ingestion job is complete, you can query the data.
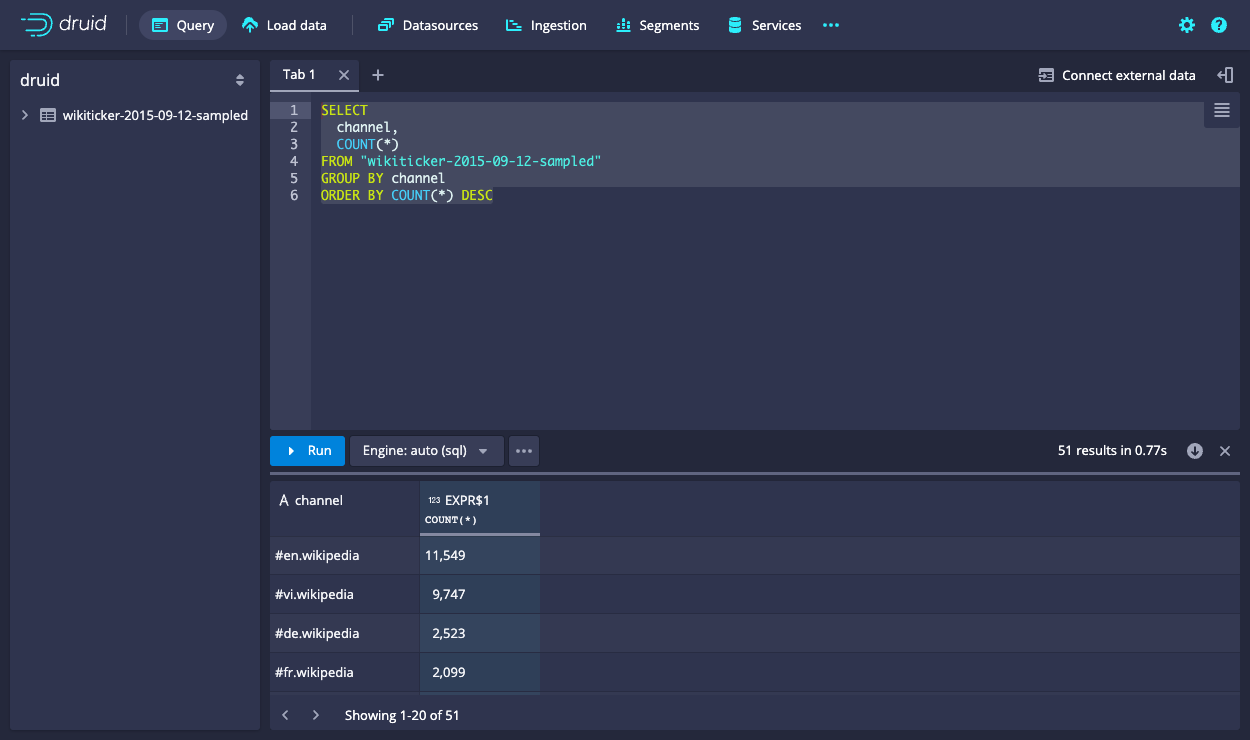
In the Query view, run the following query to produce a list of top channels:
SELECT
  channel,
  COUNT(*)
FROM "wikiticker-2015-09-12-sampled"
GROUP BY channel
ORDER BY COUNT(*) DESC
Congratulations! You've gone from downloading Druid to querying data with the MSQ task engine in just one quickstart.
Next steps
See the following topics for more information:
- Extensions for details on Druid extensions.
- MSQ task engine query syntax to further explore queries for SQL-based ingestion.
- Druid SQL overview to learn about how to query data you ingest.
- Load data with native batch ingestion to load and query data with Druid's native batch ingestion feature.
- Load stream data from Apache Kafka to load streaming data from a Kafka topic.
- API to submit query tasks to the MSQ task engine programmatically.
- Connect external data to learn how to generate a query that references externally hosted data that the MSQ task engine can use to ingest data.
- Convert ingestion spec to learn how to convert an existing JSON ingestion spec to a SQL query that the MSQ task engine can use to ingest data.
Remember that after stopping Druid services, you can start clean next time by deleting the var directory from the Druid root directory and running the bin/start-micro-quickstart script again. You may want to do this before taking other data ingestion tutorials, since they use the same Wikipedia datasource.
