9.3 KiB
| page_type | products | languages | extensions | ||||||||||||
|---|---|---|---|---|---|---|---|---|---|---|---|---|---|---|---|
| sample |
|
|
|
Enhanced List Formatting
Summary
This web part allows you to add custom CSS on a page to enhance list formatting.
Compatibility
Applies to
Prerequisites
To use this web part, you must be familiar with SharePoint list formatting and CSS.
Solution
| Solution | Author(s) |
|---|---|
| react-enhanced-list-formatting | Hugo Bernier (Tahoe Ninjas, @bernierh) |
| react-enhanced-list-formatting | David Warner II (@DavidWarnerII / Warner Digital) |
Version history
| Version | Date | Comments |
|---|---|---|
| 1.0 | March 17, 2020 | Initial release |
Minimal Path to Awesome
- Clone this repository
- in the command line run:
npm installgulp serve
This sample can also be opened with VS Code Remote Development. Visit https://aka.ms/spfx-devcontainer for further instructions.
Features
This web part demonstrates how to use a custom property pane control to allow users to inject custom CSS into the page at runtime.
Important
This web part is not intended to be used to override global CSS styles. It should only be used on custom CSS class names.
At the time that we built this solution, the only codeless way to add custom CSS classes in a SharePoint page is to use the Format view option in a list view, then insert the List web part on a page.
If you change any global styles, you may introduce unpredictable issues in your environment. Please remove the web part if you experience any issues.
Injecting custom CSS is not supported by Microsoft or the creators of this sample.
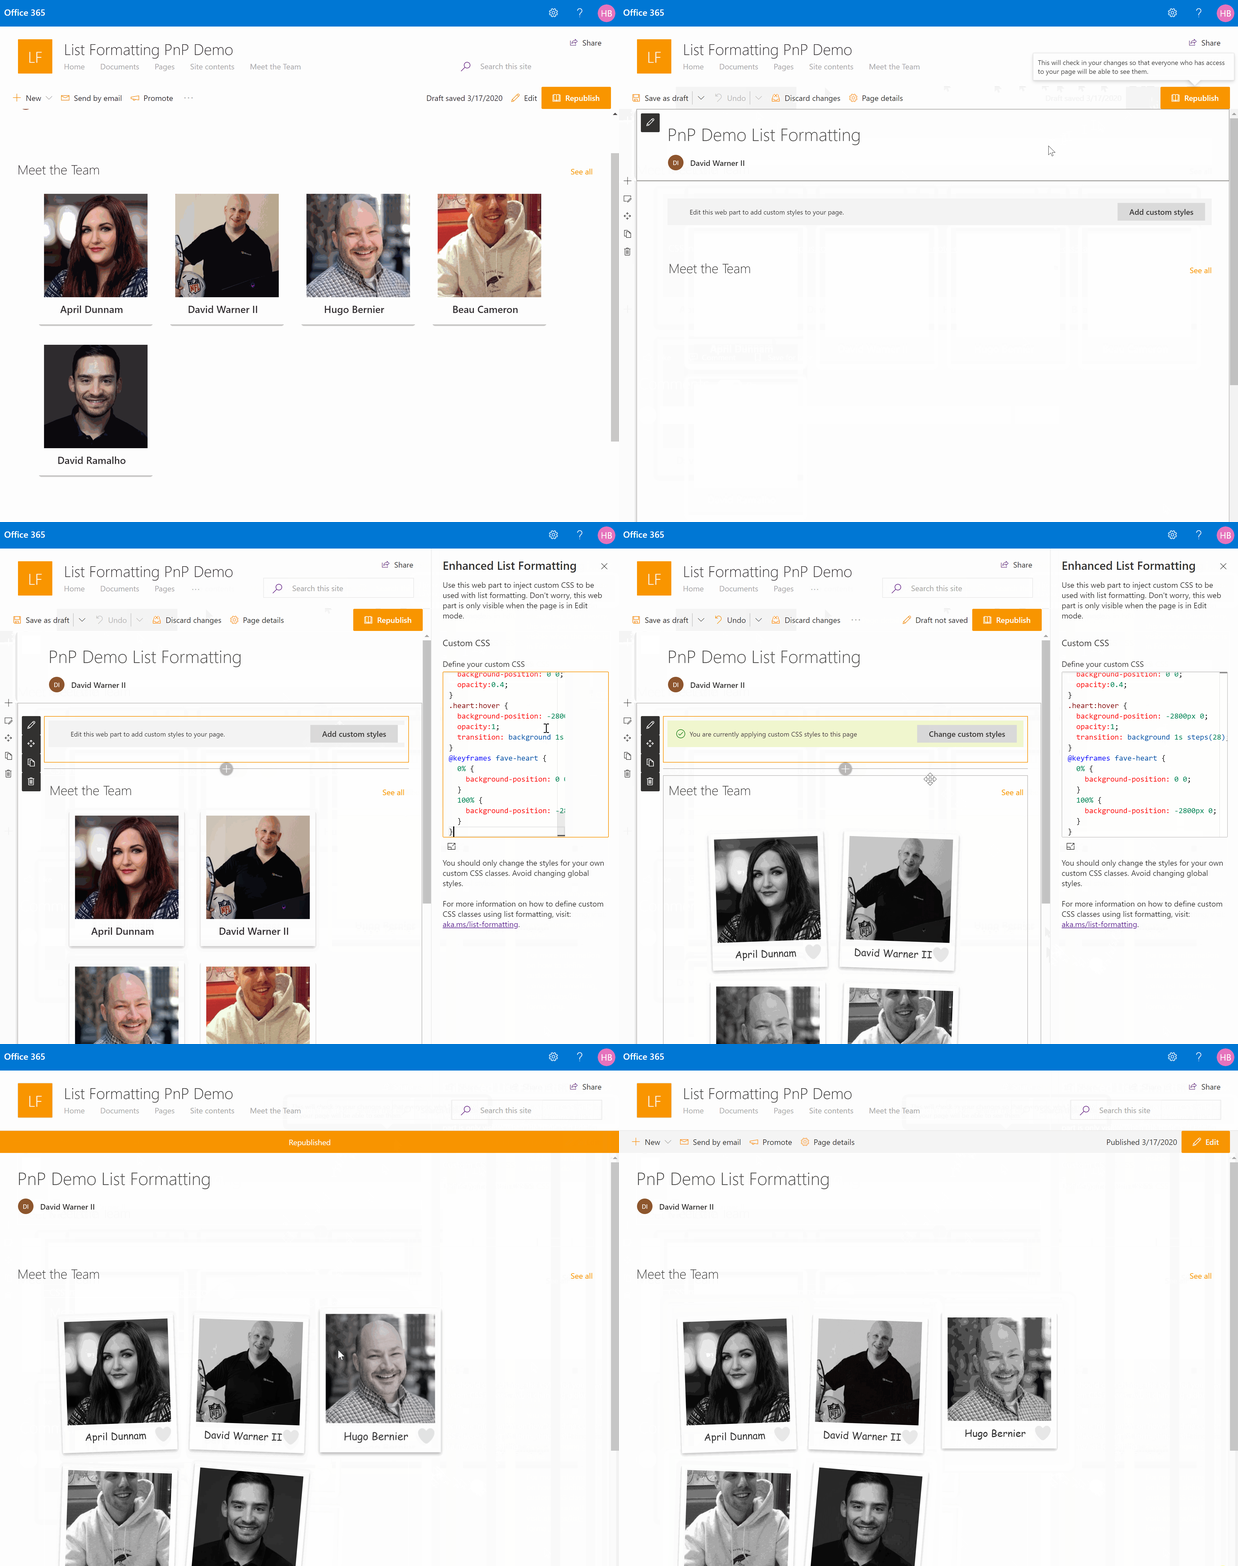
To use this web part, follow these steps:
- Create a custom list view
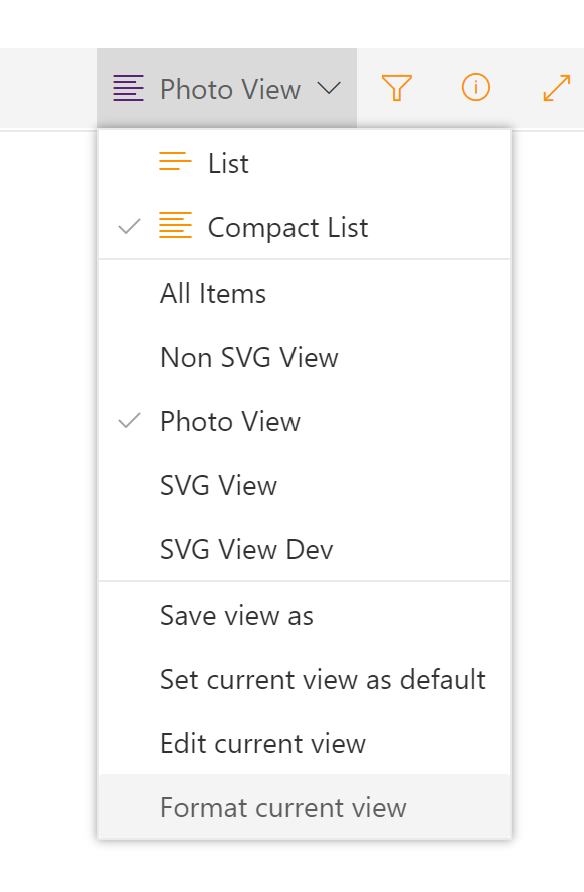
- From your custom list view, select Format current view from the view drop-down.

- In the Format view pane, add the
classattribute in an element node, as follows:
    "attributes": {
      "class": "yourcustomclassgoeshere"
    },
- Preview and Save your custom format.
- Add the list web part to a page and select the custom view you created
- Add the Enhanced List Formatting web part (this web part) to the same page where you added the List web part.
- After dismissing the disclaimer, use the web part's property pane to add your own CSS styles.
- Save your page and preview it in View mode.
TIP
Try to use the out-of-the-box custom view format schema by using the
styleattribute wherever possible. Your users may want to use your custom view in areas where the web part will not be available -- for example, within Microsoft Teams.Rely on custom CSS styles to augment your design, not replace the custom view format.
Suitable uses of this web part
Here are some examples of how you should use this web part responsibly:
- Add styles to your custom CSS classes that the custom view format schema does not support (e.g.: RGBA values)
- Add pseudo-elements styles to your custom CSS classes (e.g.:
::first-letter,::after,::before) - Add pseudo-classes styles to your custom CSS classes (e.g.:
:hover,:first,:nth-child) - Add animations to your custom CSS classes
Unsuitable uses
At the risk of repeating ourselves, do not use this web part to do the following style changes:
- Changing any CSS classes that begin with
ms-, as they indicate a Microsoft global style. - Changing element styles, unless you use your custom CSS class as a selector to ensure that your styles only apply to your list (e.g.:
div.mycustomclass,.mycustomclass > div)
Removing the annoying disclaimer
The sample has a disclaimer that is inspired by that annoying disclaimer you see on most in-dashboard GPS systems. If you want to remove it, you can do so by following these steps:
- Open `EnhancedListFormattingWebPart.manifest.json'
- Find the following section:
"properties": {
      "description": "Enhanced List Formatting"
    }
- Add the following JSON:
"acceptedDisclaimer": true
- Your
propertiesJSON should now look like this:
"properties": {
      "description": "Enhanced List Formatting",
      "acceptedDisclaimer": true
    }
- Test that your changes work by using
gulp buildandgulp serveand re-add a new version of the web part to your page - Build a production version of the solution using
gulp dist. See Building the code
Building the code
git clone the repo
cd samples/react-enhanced-list-formatting
npm i
gulp build
This package produces the following:
lib/*- intermediate-stage commonjs build artifactsdist/*- the bundled script, along with other resourcesdeploy/*- all resources which should be uploaded to a CDN.
Build options
gulp clean- Cleans the solutiongulp test- Runs unit testsgulp serve- Runs the solution for testing purposesgulp bundle- Bundles the solutiongulp package-solution- Packages the solutiongulp dev-- Builds a clean instance of the solution for development purposesgulp dist-- Builds a clean instance of the solution for distribution purposes
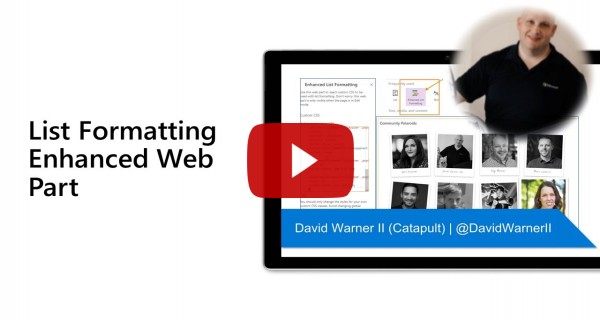
Video
Help
We do not support samples, but we this community is always willing to help, and we want to improve these samples. We use GitHub to track issues, which makes it easy for community members to volunteer their time and help resolve issues.
If you're having issues building the solution, please run spfx doctor from within the solution folder to diagnose incompatibility issues with your environment.
You can try looking at issues related to this sample to see if anybody else is having the same issues.
You can also try looking at discussions related to this sample and see what the community is saying.
If you encounter any issues while using this sample, create a new issue.
For questions regarding this sample, create a new question.
Finally, if you have an idea for improvement, make a suggestion.
Disclaimer
THIS CODE IS PROVIDED AS IS WITHOUT WARRANTY OF ANY KIND, EITHER EXPRESS OR IMPLIED, INCLUDING ANY IMPLIED WARRANTIES OF FITNESS FOR A PARTICULAR PURPOSE, MERCHANTABILITY, OR NON-INFRINGEMENT.


-Incompatible-red.svg)


